Why a Tiny Google AI Studio Experiment Might Be Your Easiest Way Into AI (Even If You’re “Not Technical”)
Follow the Same Steps to Create an App for Almost Anything You Can Imagine
Ditha Puspani
12/1/20257 min read
Everywhere you look online, people are talking about AI apps.
“Build an AI tool.” “Ship your own agent.” “Automate everything.”
If you’re like most people, a tiny voice in your head probably says, “That sounds too technical, too expensive… and probably not for me.”
I used to feel the same way.
I jumped from tool to tool, copied long prompts, and kept thinking, “There must be an easier way to do this.”
Then I found Google AI Studio—a tool that lets you turn a simple prompt into a small app for almost anything you want to build.
And the best part is, you don’t need to become an AI expert or engineer.
Google AI Studio gives you a way to test ideas quickly and see how AI can help with tasks you already do.
In this guide, you’ll see what I tried, what worked, what didn’t, and a few limitations you should know to generate better results.
I hope that it gives you clear ideas and shortcuts you can use when you build your own AI app around the work you care about most. Let’s dive in!
What we’re going to build
One of the first things I tried was creating an app that transforms low-quality images into high-quality, polished ones.
For this trial, the “app” has one clear job.
It will take any food or product image you upload and transform it into a better, higher-quality version—brighter, sharper, and more appetizing—without changing the portion size or the ingredients in the dish.
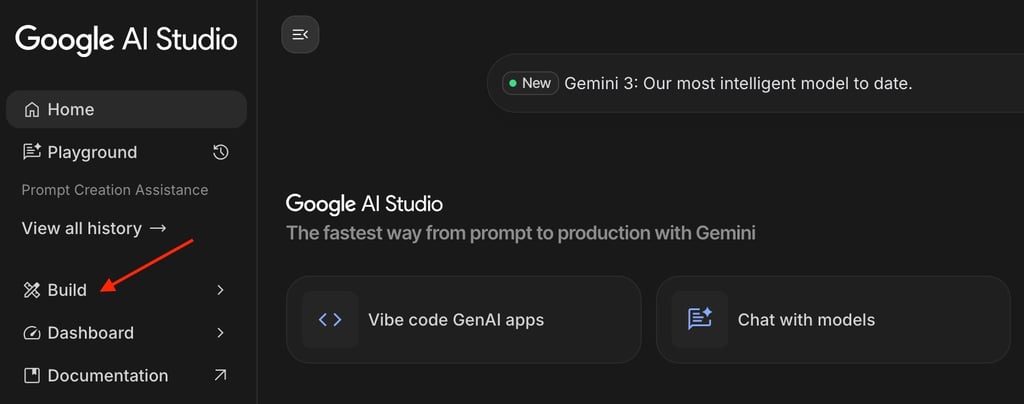
Step 1: A quick, simple tour of Google AI Studio
Before planning your app, you need to know where you’ll build it. In this case, that place is Google AI Studio.
Open your browser and go to aistudio.google.com.
Sign in with your Google account if you’re not already logged in.
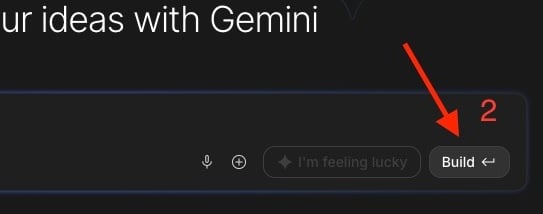
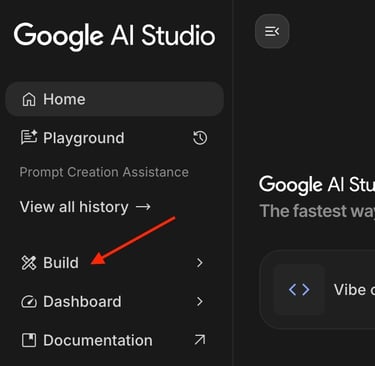
You will see “Build" on the left sidebar, and click on it.
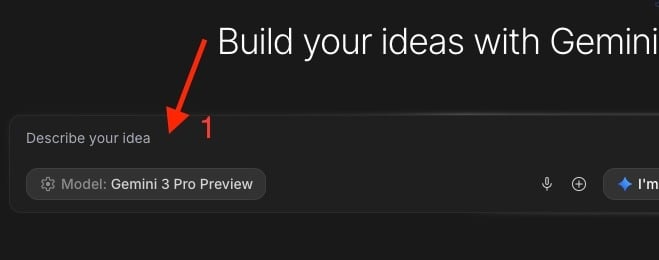
Then you’ll see a large text area where you can write or paste your instructions (Step 1). When you’re finished with your prompt, which we’ll cover in the next step, click Build (Step 2).
Step 2: Sketch the “skeleton” of your app
Now, this step is all about generating a prompt based on what your app needs. It’s like outlining a page before you start writing.
Start by asking: “What should my app have on the screen?”

For this image enhancement project, the prompt looks like this:
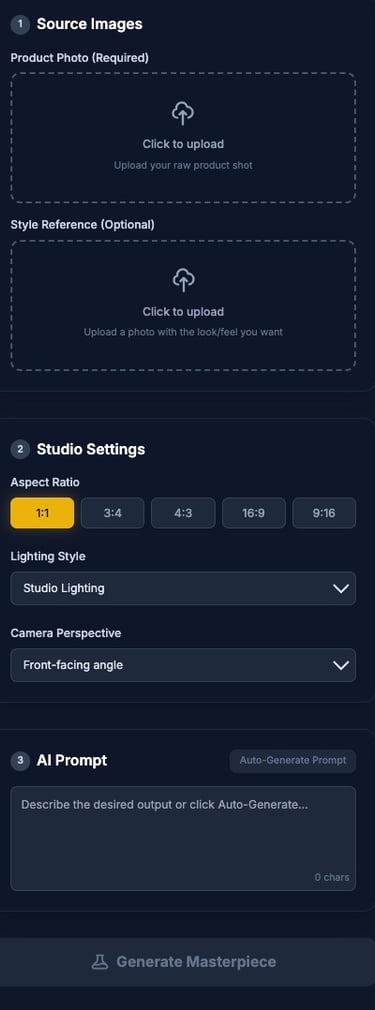
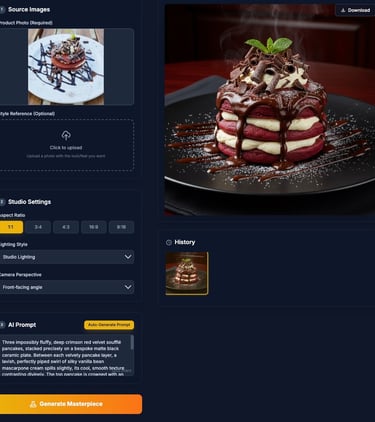
A place to upload a photo
Users need a simple spot to drop in the image they want to improve.
A place to set key options
Lighting: studio lighting, etc.
Camera angle: low angle, 45 degrees, or top‑down.
Ratio: such as 1:1 square, 4:5 for feeds, or 16:9 for banners.
A prompt box that auto‑fills
The app should build a base AI prompt automatically from the pictures the user will upload.
A “Generate image” button
After the prompt is ready and the image is loaded, you click one button.
The app sends everything to the model and gets back a new, enhanced image.
The key to this step is understanding the pieces your app needs to do its job: input, options, a prompt, and a way to run it.
And if you ever feel something is missing, you can always write a new prompt for Code Assistance to add the features you want.
For the prompt for this AI image generator, I came across a really clear tutorial on YouTube by Thomas Lundström that you should check out.
In that video, he shares a great base prompt. I’m using that as a starting point and then editing it so it fits the app I want to build.
Here's the modified prompt I used to generate the interface of my image enhancement app:
"Build me an AI photo editing app using Nano Banana. This app is to turn the product photo into a high-quality, appealing, mouth-watering photo by enhancing the tone, the background, the lighting, and the colour of the images so that the photography attracts buyers. The app should have the following features:
1) The user should be able to upload a product photo
2) Next to the uploaded image, there should be the option to choose aspect ratio, lighting style, and camera perspective.
There should also be an option to upload a style reference photo. Then the app should, based on the selected aspect ratio, lighting style, and camera perspective + possible style reference image, generate a prompt for Nano banana in a text box. Then there should be a Generate image button that takes the uploaded product and generates an image using the super-detailed image prompt created from the style reference, aspect ratio, and camera angle parameters."
Step 3: Run your first test
Now click the "Build" button to build or run your app:
You should see:
Your input on one side.
The AI’s output on the other side.
Then this is the time you make the improvement you need. For my AI image project, it is great to add a history function to save my previously generated images.
Again, with the prompt from Thomas, I added this prompt to the Code Assistant:
"Add a history function where the previously generated images are displayed."
Then click Generate.
Is your new version better than the one you had before? Did it follow the rules you set?
If “yes, somewhat,” you’re on the right track.
If “no,” that’s okay. You can ask the Code Assistant to add the feature you want.
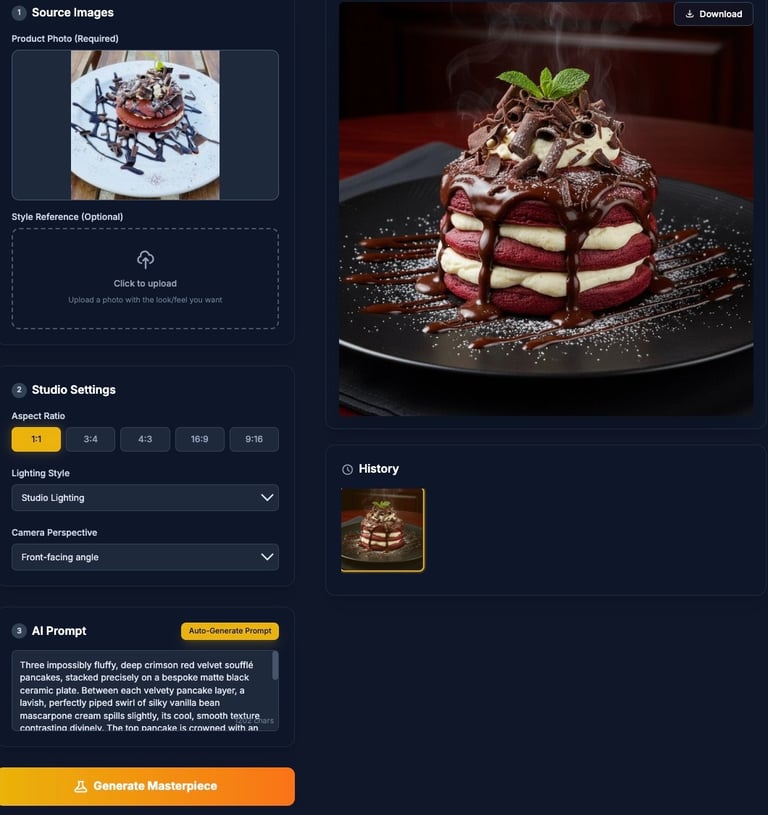
Here’s the result from my final AI-generated app, and it looks pretty decent. I just need to play with the angles and try different lighting.
Limitations
As you’d expect from a free setup, there are a few limits you should keep in mind when you build and test your app.
Don’t overload one prompt
Adding long lists of demands in a single prompt can confuse the model. It starts to ignore key parts of what you asked for.
What helped much more was changing one feature at a time in separate runs. For example, first fixing the lighting, then testing the angle, then testing color. This way, you can see exactly what each change does instead of guessing.Limits on full “app” features
For this project, it was possible to generate images using Nano Banana hardware, but not with the more powerful Nano Banana Pro version. With the current setup, that path had extra friction and limits.
There are also limits if you want custom buttons, complex layouts, or deep integrations. Many advanced features require using the Gemini API with API keys and billing, not just the free Google AI Studio interface.
But here’s the good news: within these limits, you can still get very satisfying results.
A simple, focused app that lets you upload an image, tweak a few key options, and generate a clearly better version is already a win.
And it’s enough to help you understand how AI can support the work you do every day.
Test and Improve Your Prompts
Here are a few simple tweaks that make your tests easier and your outputs better:
Change one thing at a time
As I mentioned above, do not overwhelm the model. After each run, choose one part to adjust. Maybe add “more contrast,” or remove one extra detail from the prompt.
Aim for “better,” not “perfect.”
If the new image looks clearly better than the original, that’s a win for the first test. You can always refine later or move the idea into a bigger, more advanced project once you know it works.
These small rules keep your experiments light and keep you moving forward, instead of getting stuck chasing the “perfect” output.
How to use this for your own idea
You might want to build something completely different from an image app. That’s great.
Here’s a simple way to turn this guide into your own experiment:
Choose your input
Images, text, notes, questions, product data—anything you already work with often.
Write your one‑line app job
“Upload [X] → get back [Y improvement] → so that [Z benefit].”
Open Google AI Studio and go to “Build.”
Create a new app from a prompt.
Paste a simple first prompt using the patterns from this guide.
Test and tweak slowly
Use one real example from your own work. Adjust only one part of your prompt at a time. Stop when it feels “good enough” for this round.
Later, if you want more power, you can learn about the Gemini API.
But you don’t need any of that to start. You can begin today with a simple app in the browser and grow from there.
In summary
AI is moving fast, and it’s easy to feel like you’re already behind.
But you don’t have to master everything to get real value from it.
You just need one small place to start. One simple app, one clear job, and a safe space to try things, make mistakes, and see what actually works.
Using Google AI Studio as your playground, you can start building tiny helpers that support the work you already do, whether that’s images, writing, or something completely different.